一、ESP8266简介
ESP8266 是深圳安信可科技有限公司开发的基于乐鑫ESP8266的超低功耗的UART-WIFI模块的模组,可以方便进行二次元开发,接入云端服务,实现手机3/4G全球随时随地的控制,加速产品原型设计。
核心模块处理器ESP8266在较小尺寸中继承了业界领先的Tensilical106超低功耗32位微型MCU,带有16位精简模式,支持RTOS(实时操作系统,指当外界事件或者数据变化时候能够以足够快的速度处理),集成WIFI/MAC/BB/RF/PA/LAN,板载天线。支持IEEE802.11b/g/n协议,完整的TCP/IP协议。
二、开发环境
开发环境采用Arduino IDE for ESP8266 采用 Arduino 语法进行编程设计。
三、编程
1. HTTP相关知识
HTTP是一套计算机网络通讯规则。下来主要介绍一下HTTP消息格式。详细HTTP请求请戳链接。
HTTP请求数据格式:
当浏览器发送请求是,向服务器发送了一个数据块,也就是请求信息,其中信息由三部分组成。
1. 请求方法 URI协议/版本
2. 请求头(Request Header)
3. 请求正文
GET/sample.jspHTTP/1.1
Accept:image/gif.image/jpeg,*/*
Accept-Language:zh-cn
Connection:Keep-Alive
Host:localhost
User-Agent:Mozila/4.0(compatible;MSIE5.01;Window NT5.0)
Accept-Encoding:gzip,deflate

username=jinqiao&password=1234
HTTP 请求应答格式:
当服务器收到浏览器的请求时,会向客户端返回数据,数据主要由三部分组成
1. 协议状态 版绷带吗描述
2. 响应头(ResponseHeader)
3. 响应正文
HTTP/1.1 200 OK
Server:Apache Tomcat/5.0.12
Date:Mon,6Oct2003 13:23:42 GMT
Content-Length:112

data(返回数据)
2. ESP8266 编程
下附esp8266模块发送请求的代码
/*
 *  HTTP over TLS (HTTPS) example sketch
 *
 *  This example demonstrates how to use
 *  WiFiClientSecure class to access HTTPS API.
 *  We fetch and display the status of
 *  esp8266/Arduino project continous integration
 *  build.
 *
 *  Created by Ivan Grokhotkov, 2015.
 *  This example is in public domain.
 */

#include <ESP8266WiFi.h>
#include <WiFiClientSecure.h>

const char* ssid = "zlei";
const char* password = "18829237005";

const char* host = "15r34407v7.imwork.net"; //需要访问的域名
const int httpsPort = 37170;  // 需要访问的端口
const String url = "/test";   // 需要访问的地址

void setup() {
  Serial.begin(9600);
  Serial.println();
  Serial.print("connecting to ");
  Serial.println(ssid);
  WiFi.begin(ssid, password); // 连接WIFI
  while (WiFi.status() != WL_CONNECTED) {
    delay(500);
    Serial.print(".");
  }
  Serial.println("");
  Serial.println("WiFi connected");
  Serial.println("IP address: ");
  Serial.println(WiFi.localIP()); // 显示WIFI地址
}

void loop() {
  Serial.print("connecting to ");
  Serial.println(host);

  WiFiClient client;

  /**
   * 测试是否正常连接
   */
  if (!client.connect(host, httpsPort)) {
    Serial.println("connection failed");
    return;
  }
  delay(10);

  String postRequest =(String)("GET ") + url + "/ HTTP/1.1\r\n" +
    "Content-Type: text/html;charset=utf-8\r\n" +
    "Host: " + host + "\r\n" +
    "User-Agent: BuildFailureDetectorESP8266\r\n" +
    "Connection: Keep Alive\r\n\r\n";
  Serial.println(postRequest);
  client.print(postRequest);  // 发送HTTP请求

  /**
   * 展示返回的所有信息
   */
  String line = client.readStringUntil('\n');
  while(line.length() != 0){
    Serial.println(line);
    line = client.readStringUntil('\n');
  }
  Serial.println(line);
  client.stop();
  delay(3000);
}
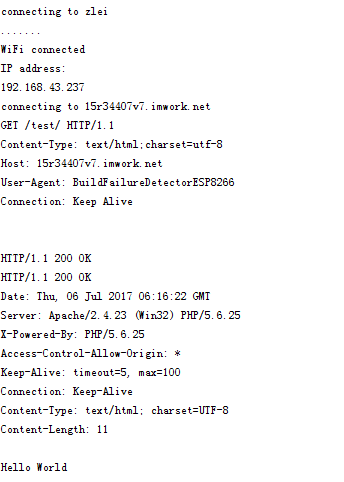
总结: 通过 WiFiClient 的 connect 方法来进行WIFI链接 通过print方法来发送HTTP请求, 以及readStringUntil(‘\n’) 来读取服务器端返回的数据。
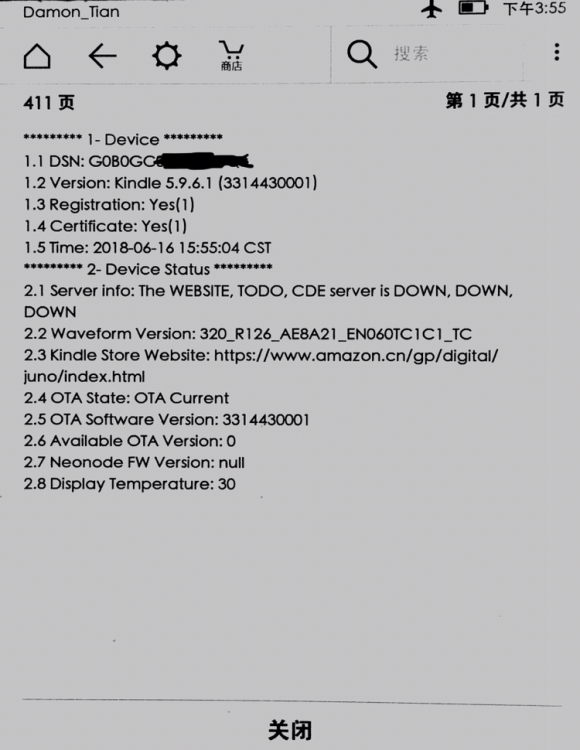
其中测试结果如图所示: